Last Updated on August 20, 2025 by Toya
Wanna learn how to make sourdough starter from scratch for beginners? This easy sourdough starter recipe is the simplest sourdough starter you’ll ever make! It’s made with just a few simple pantry staples and will help you make some amazing sourdough recipes ever!
The best part? You don’t need any fancy ingredients or equipment to make sourdough starter! I’ll show you how to do it below!
What is Sourdough Starter?
A sourdough starter is basically a living, bubbling mix of flour and water that easily replaces yeast from the store. When you stir the two together and let them sit, they naturally attract wild yeast and good bacteria from the flour and the air.
As the sourdough starter ferments, the mixture starts to bubble and give off a slightly tangy smell. That’s the yeast doing its job. This creates the gas that makes bread rise and turn soft and airy. The bacteria also adds flavor, giving sourdough its signature tang.
To make sure your starter stays healthy, you just need to “feed” it with fresh flour and water on a regular schedule. Once it’s active and full of bubbles, you can use it to bake all kinds of baked goods including sourdough bread, sourdough pizza crust, or even sourdough pancakes and sourdough waffles! And, before I begin, let’s take a look at some of the common mistakes with making sourdough starter and how you avoid each!
*Common Sourdough Starter Mistakes
- You used/are using chlorinated water: Chlorinated water won’t do your starter any good. So, instead, use filtered or boiled-and-cooled water to make your sourdough starter.
- You’re feeding inconsistently: If you can, try to feed your starter at the same time each day.
- The Starter smells bad: If your sourdough starter smells rotten or moldy, discard it and start fresh. What you want is a tangy, fruity smell not a mouldy, rotten smell.
- The Starter isn’t rising: If you find that your starter isn’t rising, try placing it in a warmer spot (75–80°F) or use whole wheat flour instaead of all purpose.
- There’s Mold on top: If you see mold, this means it’s contaminated You should throw this ways and start again.
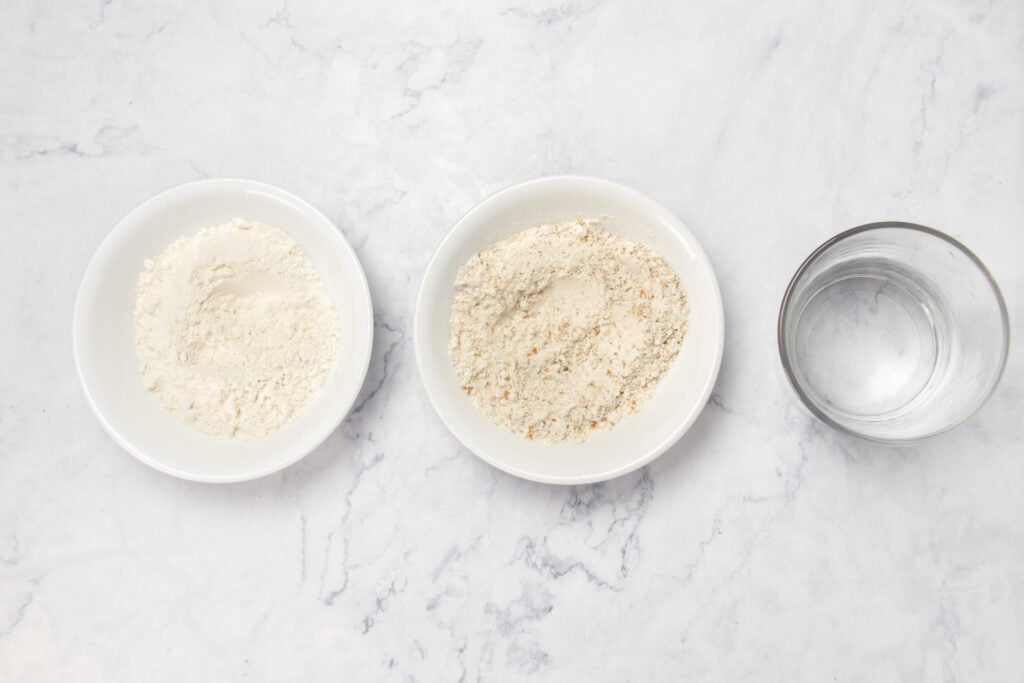
Ingredients & Tools You’ll Need
For each jar:
- 2 cups all-purpose flour, (240 g), or whole wheat flour, (220 g)
- 2 cups water, at room temperature (480 ml), added gradually over several days (Use filtered or dechlorinated water. Tap water with chlorine can slow down or even kill your starter)
Basic Tools Needed
- A clear glass jar or container (pint-sized or larger).
- A digital kitchen scale for accuracy (optional, but I highly recommend one).
- A spoon or spatula for stirring.
- A breathable cover — a cloth, coffee filter, or loosely fitted lid.
How to Make Sourdough Starter
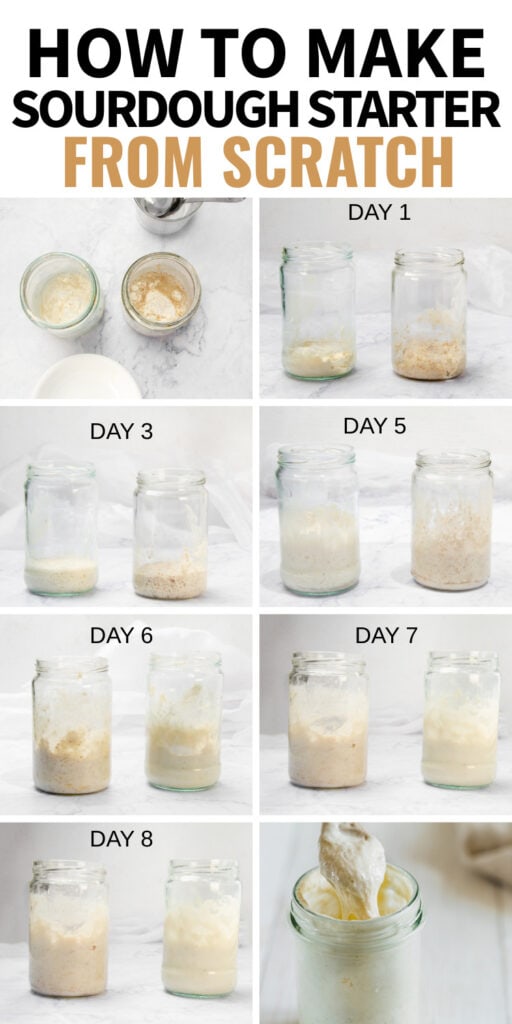
First gather all your ingredients and equipment in one place. Measure the flour and water for accuracy.
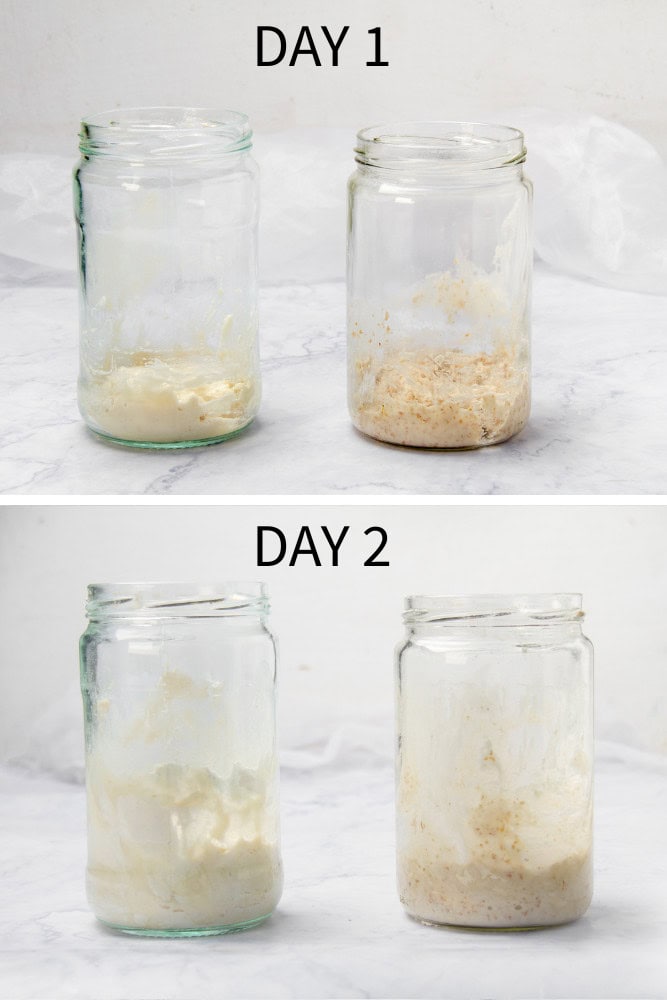
To begin your starter, take a clean glass jar with a loose-fitting lid or cloth cover. On day 1, combine ¼ cup of all purpose flour(about 28 g) with ¼ cup of water (about 60 ml) in one jar.
In a second jar, repeat the same process using whole wheat flour instead. (If you only want to make sourdough starter with the all-purpose flour, you can skip this step).
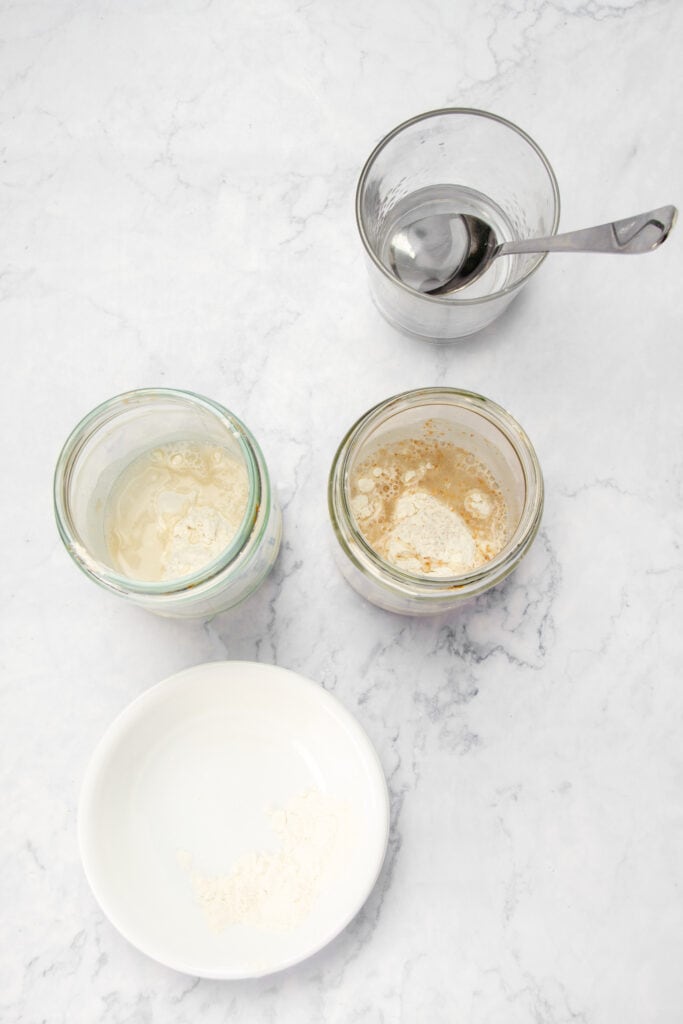
Mix both thoroughly with a wooden spoon or spatula until you have a thick paste. Cover each jar loosely to allow airflow but prevent debris or insects from getting in. Leave the jars at room temperature, away from direct sunlight.
On days 2 through 8, you must feed your starter once daily.
To feed the starter, discard about half of the mixture (you can compost it or discard it), then add 2 tablespoons of the same flour used on day 1 (about 14 g) and 2 tablespoons of water (about 30 ml). Mix well until smooth. You should start to see bubbles and a slight sour smell by day 3 or 4 — signs that the natural fermentation is working.
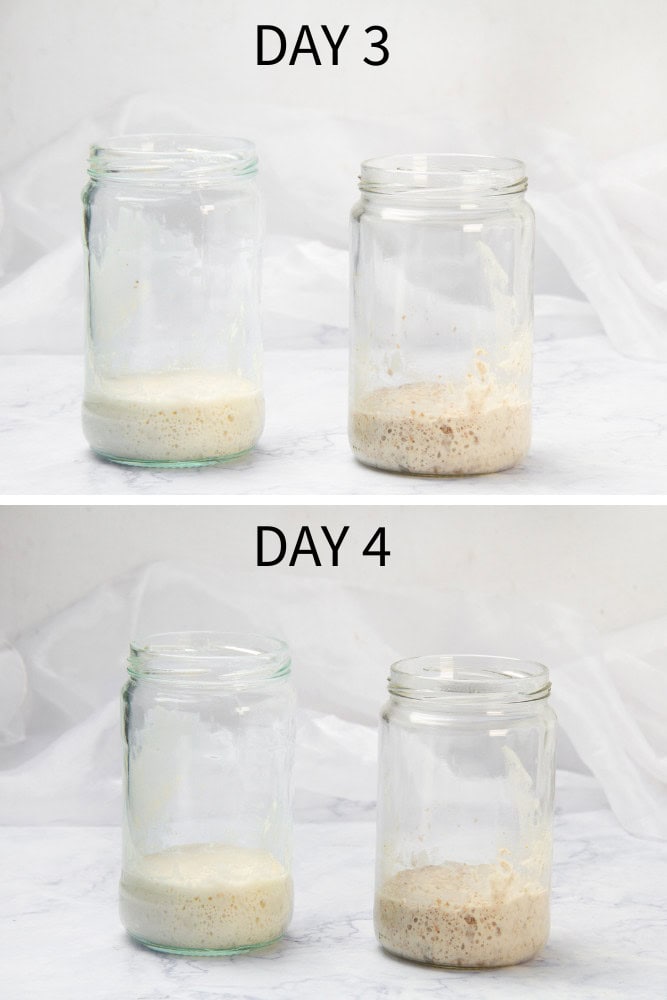
The starter may rise and fall during this period. Continue feeding both jars with their respective flours and water daily, always mixing thoroughly and keeping the jars loosely covered.
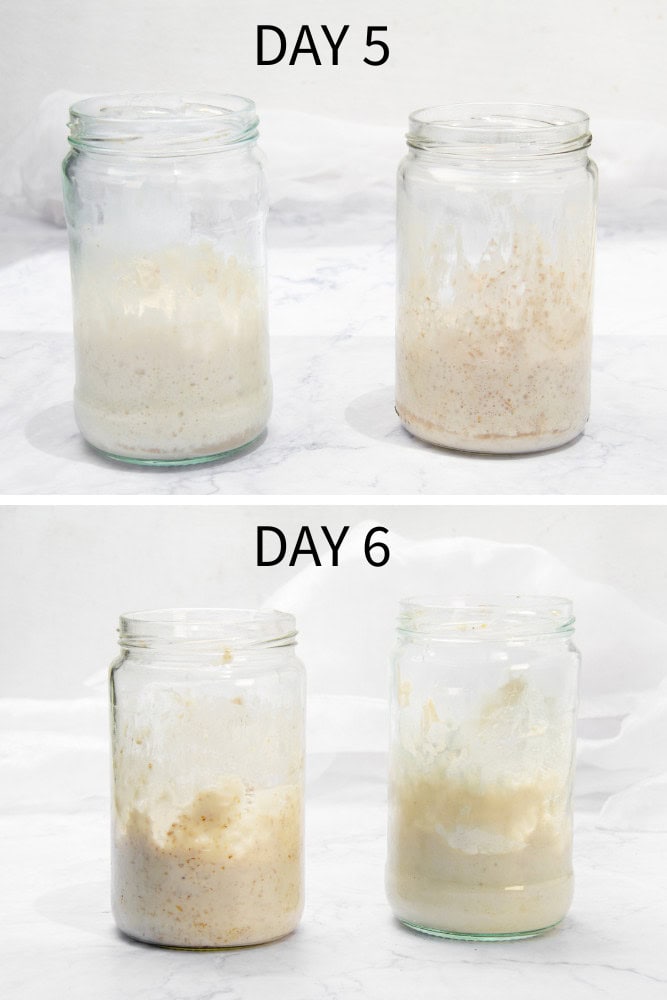
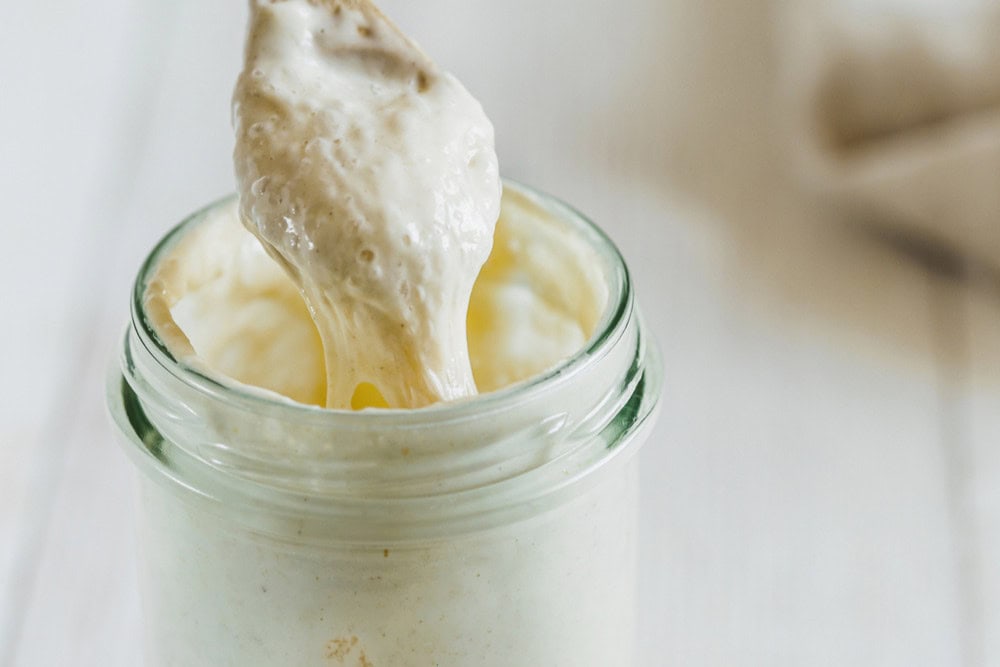
By day 7 or 8, your starter should be bubbly, have a pleasant tangy smell, and double in volume within 4–6 hours after feeding. This means it’s active and ready to use for baking.
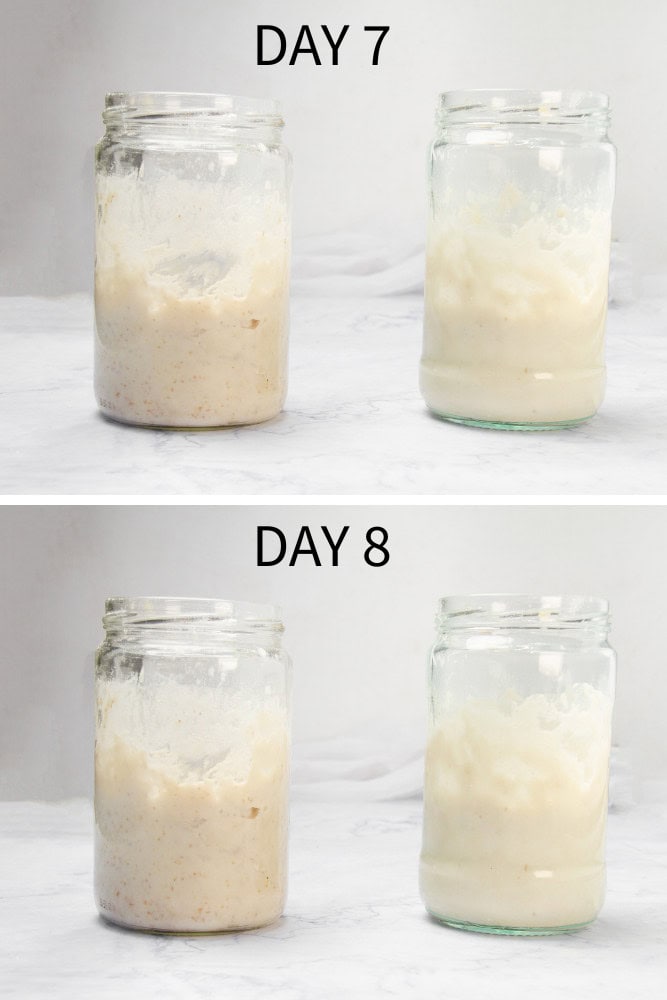
You can test it to see if it’s ready by trying the float test: drop a spoonful of starter into a glass of water. If it floats, it’s strong enough to bake with. If not, keep feeding for another few days until it passes.
At this point, you can use the starter to bake bread. You can refrigerate it if you’re not using it daily and resume feeding it once a week to keep it alive.
How to Know When Your Starter Is Ready
There are three ways to know if your sourdough starter is ready.
- Appearance: If your starter has doubled in size, is full of bubbles, and looks light and airy, it is most likely ready. Take a look at your starter for any of these signs.
- Smell test: If yous starter smells pleasantly tangy, yeasty, and slightly fruity then is it ready. It should not smell foul or rotten though.
- Float test: Take a spoonful of starter and place it in a glass of water to see if it floats instead of sinks. This is a sure sign that it is ready.
Without sourdough startes a little paince goes a long way, since some starters are ready in 5 days, while others can take up to 9 10 days to be ready!
Feeding and Maintaining Your Starter
Once your starter is strong and active, you’ll need to maintain it so it’s always ready to use.
- At room temperature: You should feed the starter daily, usually every 12–24 hours. And, if you can, try to feed it at the same time everyday.
- In the fridge: You can store it covered and feed it once a week. Before baking, you need to take it out, feed it, and let it warm up until bubbly again for best results.
- Feeding ratio: A common ratio for stater is 1:1:1. That is equal parts starter, flour, and water by weight.
Tip: Try to feed your starter before it collapses (when it starts to fall back down after rising), since that’s when it’s strongest.
What to Do With Sourdough Discard
If it’s your first time making sourdough, you might be surprised (or even a little frustrated) by the amount of starter you end up throwing away during feedings. This leftover portion that gets thrown away is called “sourdough discard” or “discard”.
It seems very wasteful to just remove so much of the sourdough, but its actually very important to remove some of the old starter or ‘’discard’’ to keep the balance of the yeast and bacteria healthy, to make sure your jar does not overflow and to make sure you starter stays strong.
If you hate the ideas of having to throw all this away though, there are a tons of ways to use it up since it’s basically flour and water that is already partially fermented. This ”discard” is a great way to add some subtle tang to your everyday recipes and make them a tad bit more interesting. For example, you can use the sourdough discard to make:
- Sourdough Pancakes & Waffles
- Crackers or Flatbreads
- Quick Breads & Muffins
- Pizza Dough
- Brownies or Cookies
- Biscuits and more!
And the best part? If you’re not ready to use your discard right away, which you might not be, you can keep a separate jar of it in the fridge and add to it after each feeding. Many home bakers keep a dedicated “discard jar” just for this!
With this simple guide, you can make a starter from scratch that is strong and bubblyand makes the best sourdough loaf! And trust me when I say this, there’s nothing like slicing into a homemade loaf with that golden crust, soft crumb, and tangy flavor!