Last Updated on August 21, 2025 by Toya
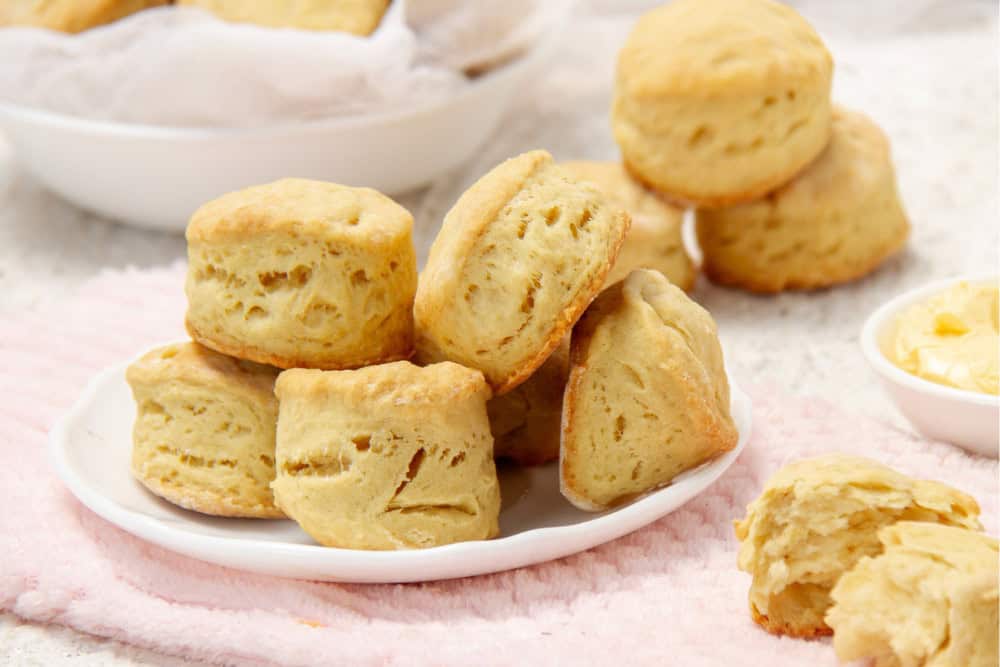
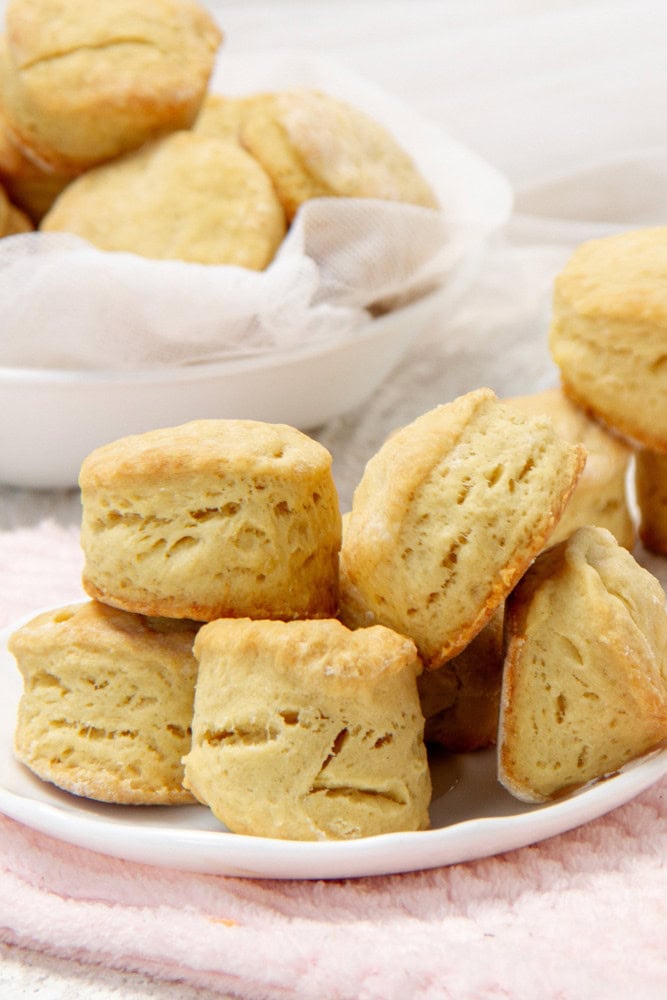
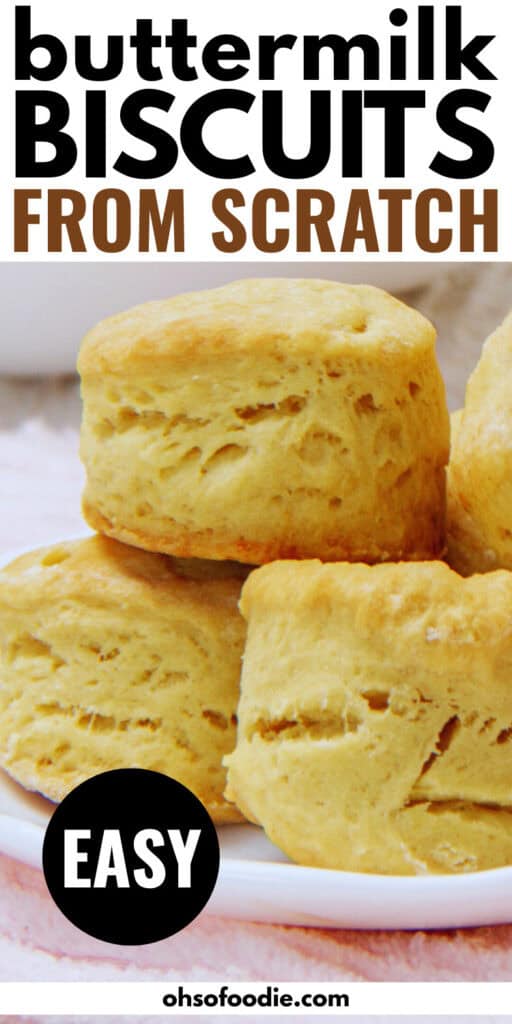
Nothing is more delicious than these warm fluffy buttermilk biscuits made from scratch! They’re buttery-soft on the inside and flaky on the outside, making them the perfect biscuits to grab for… well, everything! Plus, you can have them ready in just 35 minutes!
If you’ve been on the lookout for an easy to follow biscuit recipe then you’ve just found it right here!
In this easy recipe, I’ll show you exactly how I make my homemade buttermilk biscuits that are soft, golden, and totally irresistible! Plus, I’ll show you the simple folding trick I use to get flakier layers and a more even rise every time!
My yummy biscuits are perfect to use as a side dish, for biscuits and gravy, to make breakfast sandwiches, and, I definitely used this biscuit recipe to make my mouthwatering strawberry shortcake recipe!
Why This Biscuit Recipe Works
The method I use (especially the folding step) makes buttery layers without much hassle. I’ve tried tons of biscuit recipes over the years, and this combo — good tools, cold ingredients, and gentle handling — is what have given me flaky biscuits that are super easy to make!
Tools Needed to Make Homemade Biscuits
- Mixing Bowls – You need a large bowl that gives you plenty of space to mix the dough and a few others for prepping your ingredients. I like these great mixing bowls from amazon, but anything you have at home that’s large enough will work.
- Pastry Cutter, Your Fingers (or Two Forks) – This tool is used to cut cold butter into the flour mixture — This is a key step for flaky biscuit layers. And while a pastry cutter is not a must, since you can use two forks or even your fingers, it makes this process so much faster and more consistent. If you want one, this affordable pastry cutter on Amazon is a great pick — sturdy, comfortable to hold, and gets the job done quickly.
- Measuring Cups and Spoons – You need accurate measurements for most recipes, but especially when you’re baking biscuits. These are my favorite measuring cups and spoons. I found them on amazon and I’ve stopped using any other ones I have in my kitchen!
- Biscuit Cutter (or Round Cookie Cutter or Glass) – These are important if you want clean biscuit edges and if you want your biscuits to rise well. While you can use a glass, you might want to avoid using it to cut out the biscuits if you want the fluffiest biscuits — the glass can seal the edges and prevent a good rise. If you don’t already have one, a set like this stainless steel biscuit cutter set from Amazon works perfectly — and gives you clean cuts every time without sealing the edges.
- Rolling Pin (Optional) – This tool is not necessary, but it is helpful if you want a more even dough surface. Otherwise, you can just pat the dough out by hand.
- Dough Scraper or Spatulas – Great for lifting and folding the dough without sticking or tearing — especially during the layering step.
- Baking Sheet – A flat baking sheet is needed to make the biscuits.
- Parchment Paper or Silicone Baking Mat – You need this to prevent your biscuits from sticking to the sheet pan.
- Pastry Brush (Optional) – For brushing melted butter on top of the biscuits.
- Food Processor (Optional) – If you have one, this makes the entire process a whole lot easier (check out the food processor directions below). If you need one, you can use this compact and reliable food processor — it cuts the butter in seconds and keeps everything cold, which is key for flaky biscuits!
Why I Always Use a Dough Scraper for Biscuits
When you’re making biscuits from scratch, a dough scraper can be a surprisingly helpful tool. Biscuit dough is soft and sticky, especially if it’s made properly (with cold butter and just enough liquid). This is perfect for tender layers — but it can be tricky to handle biscuit dough and that’s where a tool like a doug scraper comes in. It helps you to:
- It makes it super easy to lift and turn the dough without it tearing or having it stick to your hands or the counter.
- During the folding step (which creates those flaky biscuit layers), it helps you to neatly lift and fold the dough without overhandling it.
- A dough scraper replaces a lot of hand-contact which helps to keep the dough cold — which is another key for making flaky homemade biscuits.
- And it makes cleanup easier since you can scrape up every last piece of dough from your work surface.
So, if you’re making biscuits regularly (or even just once in a while), I think this is one of those little tools that makes a big difference.

If you’ve never used a dough scraper, this one is a great first choice. It’s sturdy, stainless steel, easy to clean, and it even has measurement markings.
The Biggest Mistakes People Make with Buttermilk Biscuits
There’s nothing better than a batch of warm, flaky buttermilk biscuits… unless they turn out flat, dense, or tough. If your biscuits haven’t been rising like you want them to, it’s likely because you are making one of these common mistakes.
The #1 Mistake Everyone Makes
Overworking the Dough
Biscuits need a light touch. Overmixing or kneading develops gluten (like bread), making them chewy instead of tender. Overtaxing also makes it so that the butter melts from the warmth of your hands, so you lose those little fat pockets that create flakiness. To avoid this, mix until the ingredients just come together, and handle the dough as little as possible.
Other Common Mistakes
- Butter (or Fat) Isn’t Cold Enough – Warm butter blends into the flour instead of staying in little chunks and without those chunks, you won’t get flaky biscuit layers. Make sure this never happens by keeping your butter very cold (even frozen and grated) and work quickly.
- Using Old Baking Powder/Soda – If your biscuits are flat, it could be because you used outdated baking powder. So, make sure your baking powder is fresh (you can test it by dropping some in hot water. If it fizzes, then It’s good).
- Skipping the Fold for Layers – Rolling once and cutting gives you some more like scones but not the tall, layered biscuits you want. Make sure to gently fold the dough over itself 2–3 times before you start cutting.
- Twisting the Biscuit Cutter – Twisting seals the edges, so your biscuits can’t rise tall. When cutting, make sure to press the cutter straight down and lift straight up.
- Using Warm Buttermilk – Warm liquid warms the butter too fast. So, make sure to use cold buttermilk in your dough.
Fluffy biscuits come down to two things: cold ingredients and a gentle hand. If you avoid these mistakes, you’ll have tall, flaky biscuits every time! At this point, you should feel more ready to make those biscuits so let’s go!
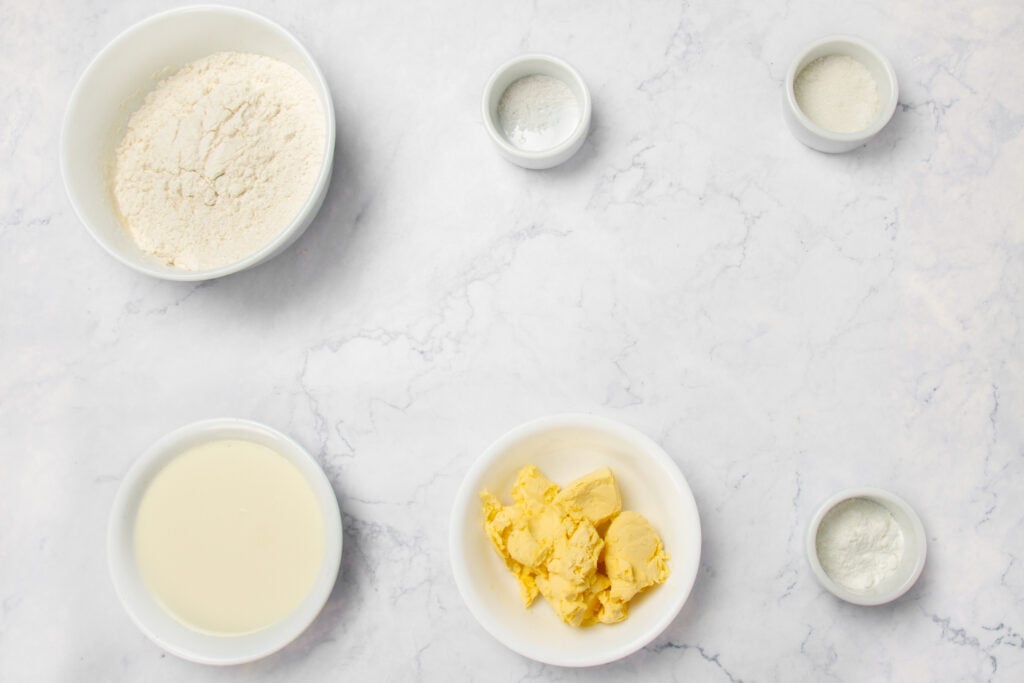
Ingredients Needed (Makes 10 – 12 Biscuits)
- 2 cups all-purpose or bread flour (300 g)
- 4 teaspoons baking powder
- ½ teaspoon salt
- 2 ½ tablespoons sugar
- ½ cup unsalted butter, cold (1 stick or 113 g)
- 1¼ cups buttermilk (300 ml)
- Extra flour for shaping
- 1 egg yolk or 2–3 tablespoons buttermilk for brushing (optional)
- 2 tablespoons unsalted butter, melted (for brushing after baking)
How to Make Buttermilk Biscuits From Scratch
Start by preheating your oven to 425°F (220°C), or 400°F (200°C) if using a glass or aluminum baking dish. Lightly grease your baking sheet or line it with parchment paper—I recommend precut sheets to avoid the hassle of fiddling with rolls. Also, gather your ingredients (already measured out) in one place.
In a large mixing bowl, combine the flour, baking powder, salt, and sugar. Stir well with a whisk or fork to distribute the ingredients evenly.

Then add the butter cold, cubed butter to the flour mixture and use a pastry cutter (like this one) or your fingertips to rub the butter into the flour until it resembles coarse crumbs—think small pea-sized bits. And, it’s okay if there are small visible bits of butter.
If you’re using a food processor (check out the instructions below)

In a small bowl or measuring cup, mix the buttermilk (or milk) with the vanilla extract, then pour this liquid into the dry mixture.
Use a spatula or fork to gently stir just until the dough comes together. It may look a bit shaggy and even a bit crumbly — that’s perfect. You need to avoid over mixing.
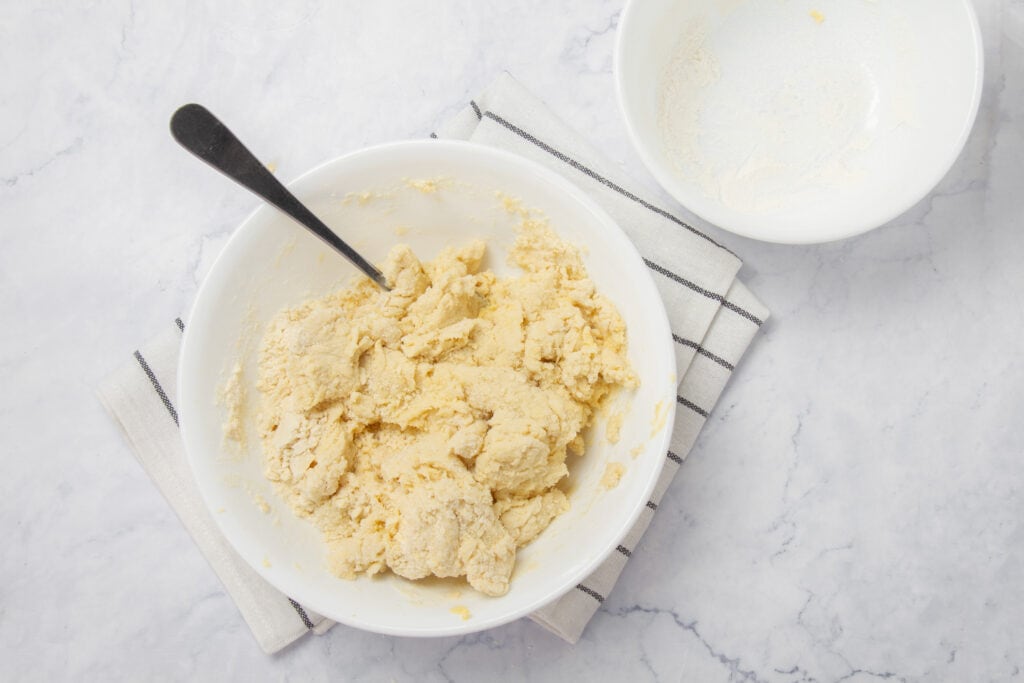
Keep an open jar of flour nearby. Then turn the crumbly dough out onto a floured surface and use your hands to gently knead it until just combined—again, do not over-mix.
Using floured hands or a floured rolling pin, gently pat the dough down with your hands to flatten it to about ¾-inch – 1-inch thick. Fold the dough in half, rotate it, and flatten it again.
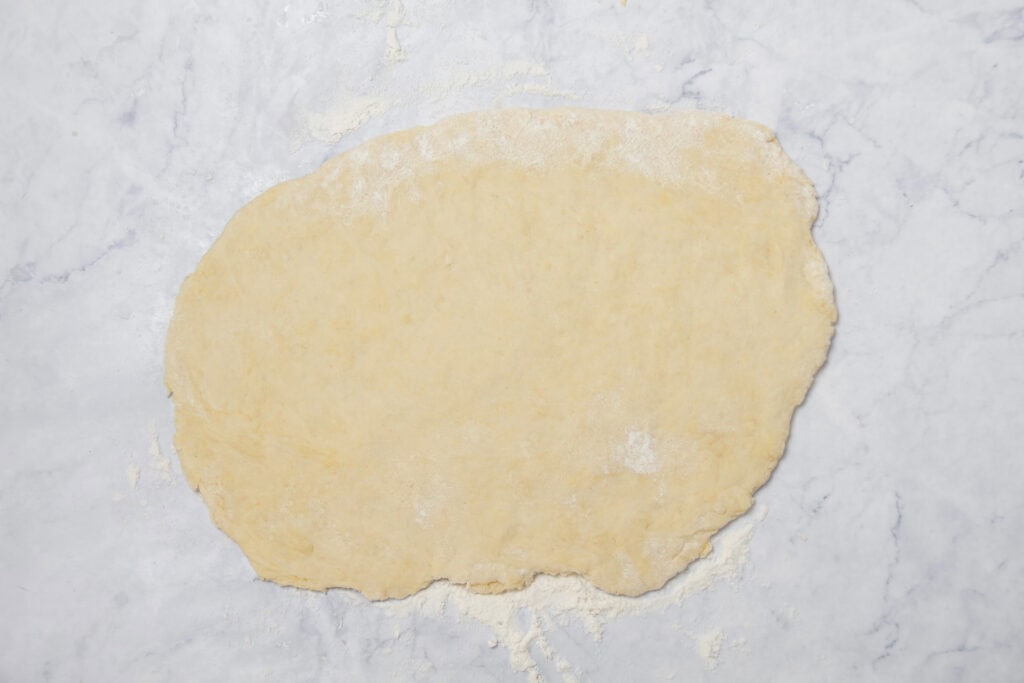
Repeat this folding process two more times to help create flaky layers.

Then finally flatten the dough to about ¾-inch to 1-inch thick .
Next, dip a round cookie or biscuit cutter in flour, and cut out the biscuits. Press straight down without twisting to help the biscuits rise evenly.

Gather any dough scraps and gently press them together before cutting out more biscuits. You should get about 12 biscuits.
Place the biscuits close together on a baking sheet lined with parchment paper or in a buttered baking dish if you prefer soft sides. If using, brush the tops of the biscuits with some buttermilk (or beaten egg yolks) to give them a golden color.

Bake in the preheated oven for 20 minutes or until the tops are golden brown. Remove from the oven and immediately brush with the 2 tablespoons of melted butter for extra flavor and softness. Let the biscuits cool slightly before serving.

💡 Biscuit Tip: Don’t twist the cutter – When you’re cutting out the biscuits, press straight down and lift up cleanly. Twisting seals the edges and prevents the biscuits from rising properly.
Buttermilk Biscuits (Food Processor Method)
- Preheat your oven to 425°F (220°C), or 400°F (200°C) if using a glass or aluminum baking dish. Line a baking sheet with parchment paper.
- In the food processor, combine the flour, baking powder, salt, and sugar. Pulse a few times to mix.
- Add the cold cubed butter to the flour mixture. Pulse about 8–10 times, until the mixture resembles coarse crumbs with some pea-sized butter pieces.
- While pulsing, slowly pour in the buttermilk through the feed tube until the dough just comes together. Be careful not to overmix — you want a slightly sticky dough.
- Transfer the dough onto a lightly floured surface. Gently pat it down to about ¾-inch (2 cm) thickness.
- Fold the dough in half, then gently pat it down again. Repeat this folding 3 to 4 times to create layers for flakiness.
- Flatten the dough one last time to about ¾ to 1 inch (2 to 2.5 cm) thick.
- Using a floured biscuit cutter, cut out the biscuits without twisting the cutter.
- Place the biscuits close together on your prepared baking sheet or buttered dish. If using, brush the tops with the beaten egg yolk for a golden finish.
- Bake for 20 minutes, or until golden brown on top.
- Remove from the oven and immediately brush with melted butter. Let cool slightly before serving.
What to Serve with Buttermilk Biscuits
These biscuits go with just about anything. You can enjoy them:
- Slathered with butter and honey
- Topped with sausage gravy
- Alongside a hearty chili or stew
- For breakfast sandwiches with egg, cheese, and bacon
- For making strawberry shortcakes! Yum!

Buttermilk Biscuits From Scratch
These homemade buttermilk biscuits are soft, flaky, and buttery with golden tops and tender layers. Made completely from scratch with simple pantry ingredients — these are perfect for breakfast, brunch, or alongside your favorite comfort meal!
Ingredients
- 2 cups all-purpose or bread flour (300 g)
- 4 teaspoons baking powder
- ½ teaspoon salt
- 2½ tablespoons sugar
- ½ cup unsalted butter, cold (1 stick or 113 g)
- 1¼ cups buttermilk (300 ml)
- Extra flour for shaping
- 1 egg yolk or 2–3 tablespoons buttermilk for brushing (optional)
- 2 tablespoons unsalted butter, melted (for brushing after baking)
Instructions
- Start by preheating your oven to 425°F (220°C), or 400°F (200°C) if using a glass or aluminum baking dish. Lightly grease your baking sheet or line it with parchment paper—I recommend precut sheets to avoid the hassle of fiddling with rolls. Also, gather your ingredients (already measured out) in one place.
- In a large mixing bowl or your food processor (instructions for food processor version in Notes Section), combine the flour, baking powder, salt, and sugar. Stir well with a whisk or fork to distribute the ingredients evenly.
- Then add the butter cold, cubed butter to the flour mixture and use a pastry cutter (like this one) or your fingertips to rub the butter into the flour until it resembles coarse crumbs—think small pea-sized bits. And, it’s okay if there are small visible bits of butter.
- In a small bowl or measuring cup, mix the buttermilk (or milk) with the vanilla extract, then pour this liquid into the dry mixture.
- Use a spatula or fork to gently stir just until the dough comes together. It may look a bit shaggy and even a bit crumbly — that’s perfect. You need to avoid over mixing.
- Keep an open jar of flour nearby. Then turn the crumbly dough out onto a floured surface and use your hands to gently knead it until just combined—again, do not over-mix.
- Using floured hands or a floured rolling pin, gently pat the dough down with your hands to flatten it to about ¾-inch – 1-inch thick. Fold the dough in half, rotate it, and flatten it again.
- Repeat this folding process two more times to help create flaky layers.
- Then finally flatten the dough to about ¾-inch to 1-inch thick .
- Next, dip a round cookie or biscuit cutter in flour, and cut out the biscuits. Press straight down without twisting to help the biscuits rise evenly.
- Gather any dough scraps and gently press them together before cutting out more biscuits. You should get about 12 biscuits.
- Place the biscuits close together on a baking sheet lined with parchment paper or in a buttered baking dish if you prefer soft sides. If using, brush the tops of the biscuits with some buttermilk (or beaten egg yolks) to give them a golden color.
- Bake in the preheated oven for 20 minutes or until the tops are golden brown. Remove from the oven and immediately brush with the 2 tablespoons of melted butter for extra flavor and softness. Let the biscuits cool slightly before serving.
Notes
Buttermilk Biscuits (Food Processor Method)
- Preheat your oven to 425°F (220°C), or 400°F (200°C) if using a glass or aluminum baking dish. Line a baking sheet with parchment paper.
- In the food processor, combine the flour, baking powder, salt, and sugar. Pulse a few times to mix.
- Add the cold cubed butter to the flour mixture. Pulse about 8–10 times, until the mixture resembles coarse crumbs with some pea-sized butter pieces.
- While pulsing, slowly pour in the buttermilk through the feed tube until the dough just comes together. Be careful not to overmix — you want a slightly sticky dough.
- Transfer the dough onto a lightly floured surface. Gently pat it down to about ¾-inch (2 cm) thickness.
- Fold the dough in half, then gently pat it down again. Repeat this folding 3 to 4 times to create layers for flakiness.
- Flatten the dough one last time to about ¾ to 1 inch (2 to 2.5 cm) thick.
- Using a floured biscuit cutter, cut out the biscuits without twisting the cutter.
- Place the biscuits close together on your prepared baking sheet or buttered dish. If using, brush the tops with the beaten egg yolk for a golden finish.
- Bake for 20 minutes, or until golden brown on top.
- Remove from the oven and immediately brush with melted butter. Let cool slightly before serving.
Nutrition Information:
Yield: 12 Serving Size: 1Amount Per Serving: Calories: 243Total Fat: 11gSaturated Fat: 6gTrans Fat: 0gUnsaturated Fat: 4gCholesterol: 43mgSodium: 358mgCarbohydrates: 30gFiber: 1gSugar: 5gProtein: 6g